
- How to Install SureMail: A Step-by-Step Guide
- Introduction to SureMail
- Introduction to Connections Tab
- Introduction to Email Logs Tab
- How to Set Up Multiple Backup Connections for Each “From Email” in SureMail
- How SureMail Auto-Retry Works
- What is Reputation Shield?
- Resend Emails
- Email Simulation
- SureMail – OttoKit Integration
Connecting SureContact Inside SureMail
SureMails allows you to use SureContact as your email sending provider, routing transactional emails from your WordPress site through SureContact’s reliable relay infrastructure. To see on how to configure SureContact SMTP, you can check on this documentation.
This guide covers three connection paths: creating a new SureContact account directly from SureMails, connecting an existing SureContact account via OAuth, and adding additional sender addresses for paid users.
Prerequisites
Before connecting SureContact inside SureMails, please ensure the following:
1. WordPress Admin Access Is Required
You must be logged in as a WordPress administrator to access SureMails settings and manage connections.
2. SureMails 2.0.0 or later upcoming version, Must Be Installed on Your WordPress Site
Install and activate the SureMails plugin from the WordPress plugin directory or your account dashboard before proceeding.
3. A Valid Email Address Is Ready (New Users)
If you are creating a new SureContact account, have the email address you want to register with ready. A verification email will be sent to this address, and without verification, you will only be able to send 3 emails. To send all 100 Free emails, you need to verify your email address.
4. SureContact Account Credentials Are Available (Existing Users)
If you are connecting an existing SureContact account, ensure you have access to your SureContact login credentials to authorize the connection at app.surecontact.com.
New SureContact User – Create a SureContact Account from SureMails
Follow these steps if you do not yet have a SureContact account. A new account will be created automatically during the connection process.
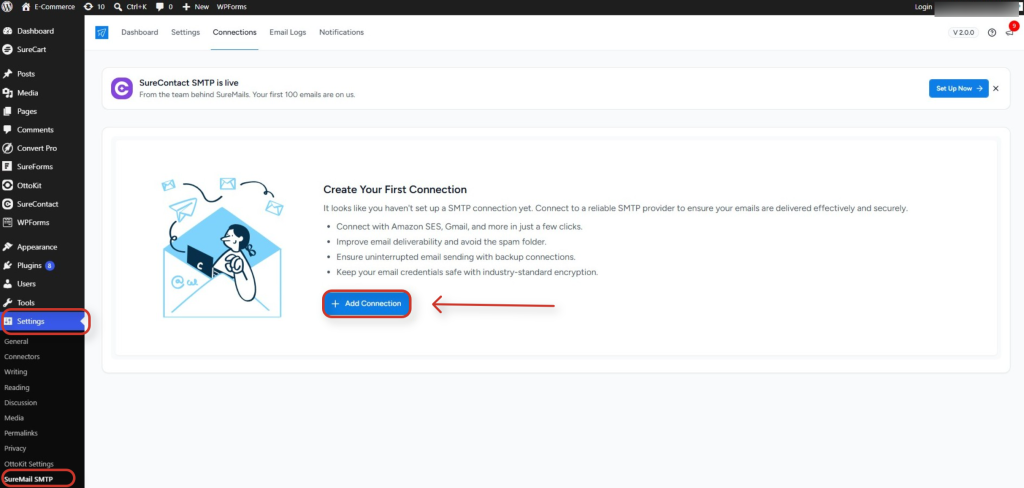
1. Open SureMails
- In your WordPress dashboard, navigate to WP Admin → SureMail → Connections → Add New Connection.
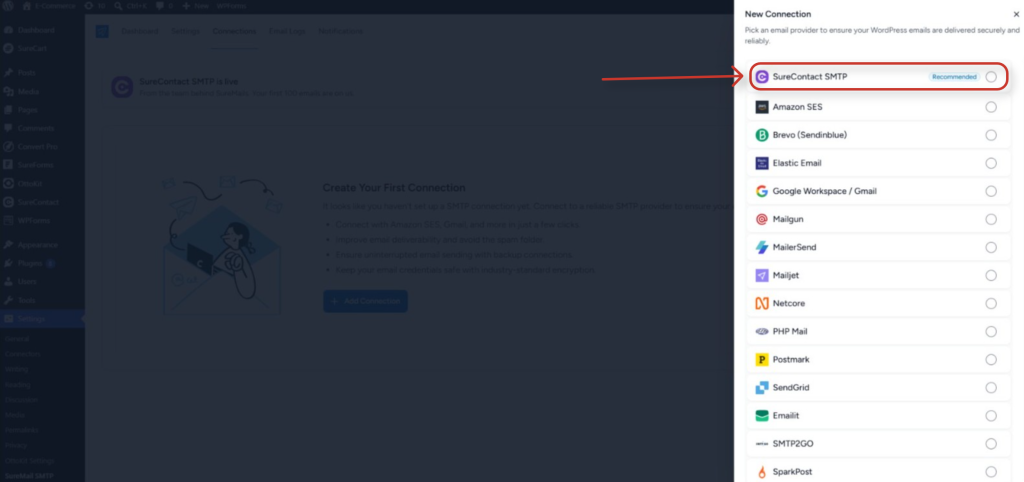
2. Select SureContact as the Provider
- In the provider list that appears, choose SureContact.
3. Fill in the Connection Form
- Three fields appear: Name, Email, and Website.
- Name – Enter your name.
- Email – Enter the email address to register your SureContact account with.
- Website – This field is auto-filled with your site URL. Do not change it.
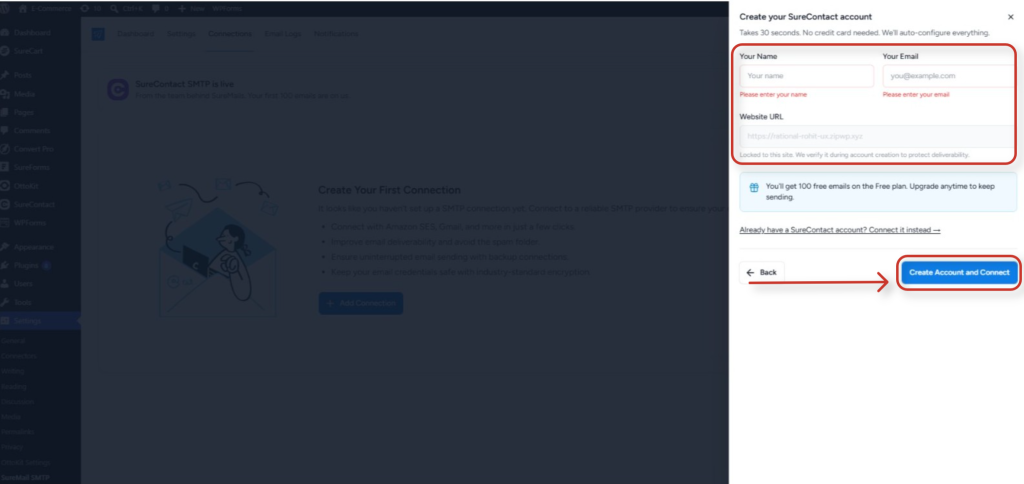
- Click Connect when done.
4. Verify Your Email
- SureContact sends a verification email to the address you entered.
- Open the email and click the verification link to confirm your account.
- If you did not receive the email, go to SureMails → Connections and click Resend Verification Email on the SureContact connection.
5. Connection Is Active
- Once verified, your SureContact connection is live and ready to use.
- You receive 100 free lifetime emails routed through SureContact’s relay.
- The connection appears in your list with the from-email and account status displayed.
New SureMail Onboard flow- Create new SureContact account from Onboarding flow
1. Open SureMails
- In your WordPress dashboard, navigate to Plugins → SureMail → Set up Wizard, or you will get the new onboarding flow once you install the plugin.
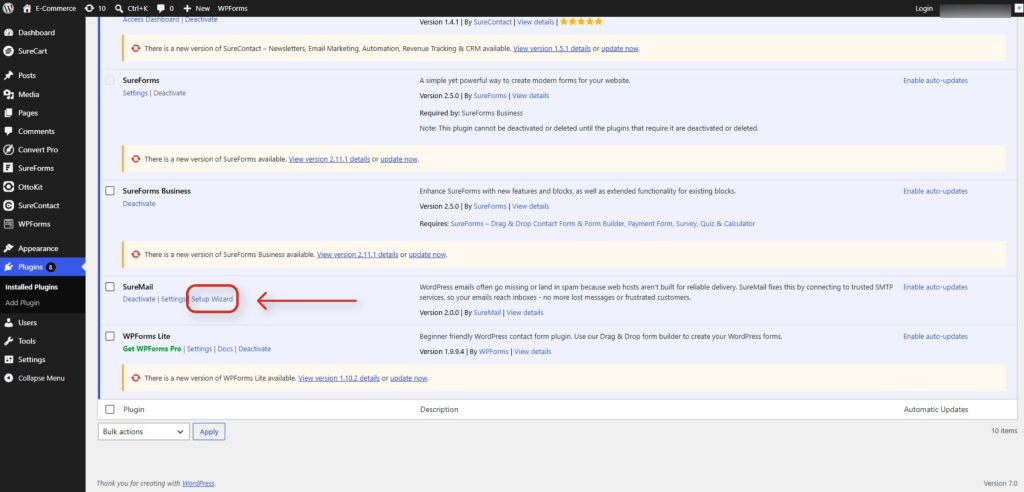
2. You will see the onboarding flow
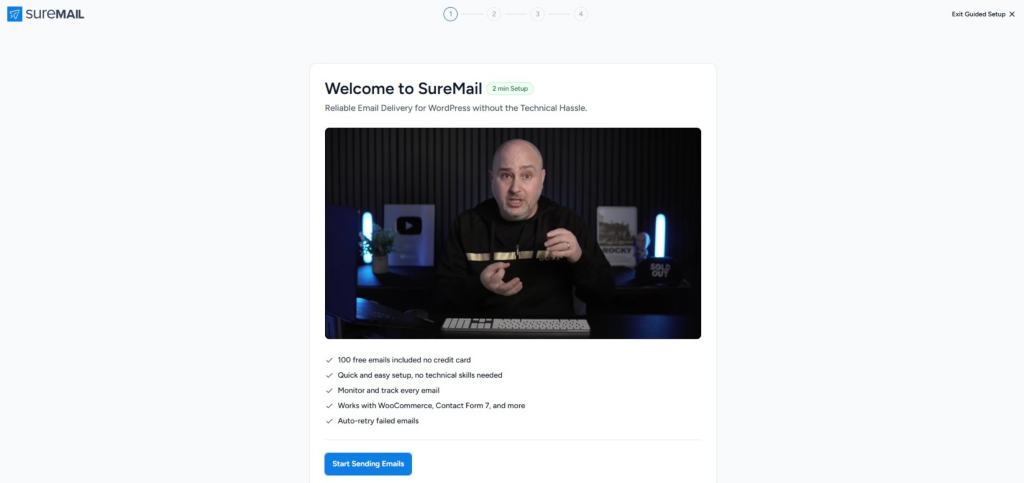
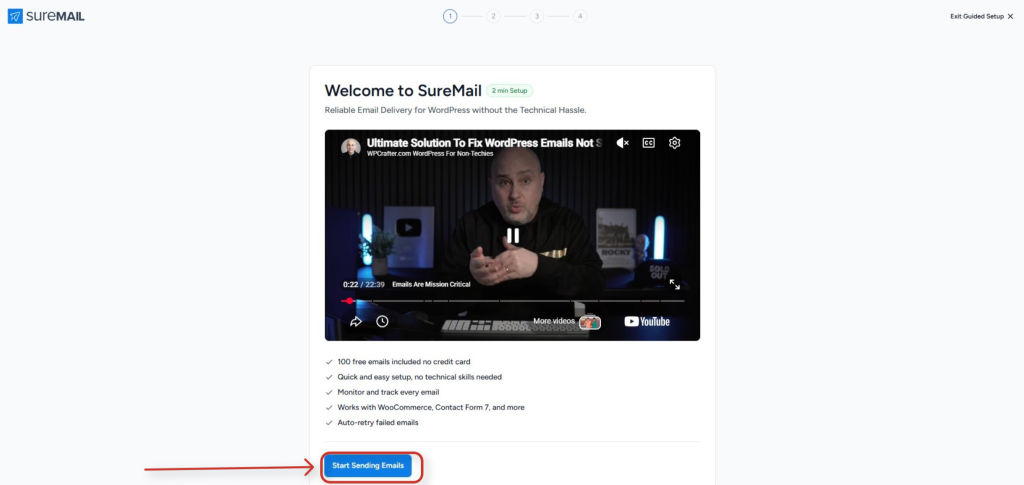
3. Click on Start Sending emails
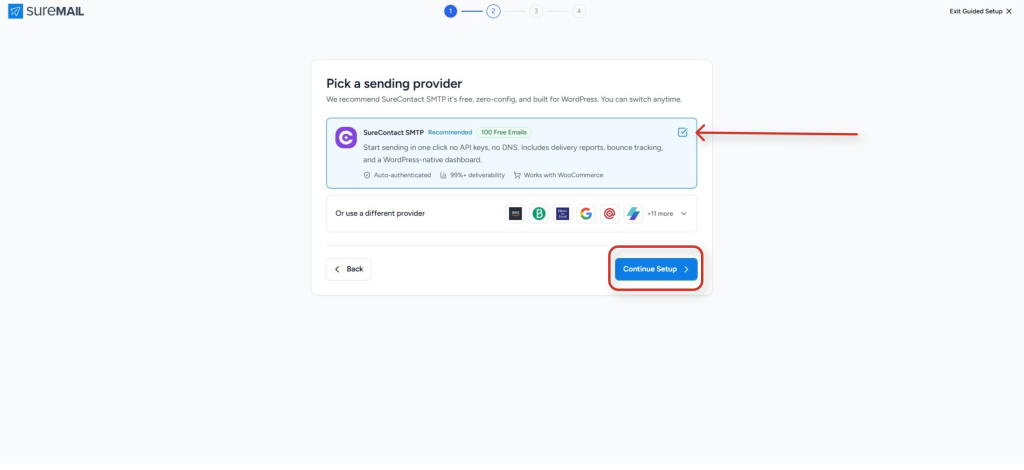
4. Pick SureContact SMTP as the provider and click Continue Setup
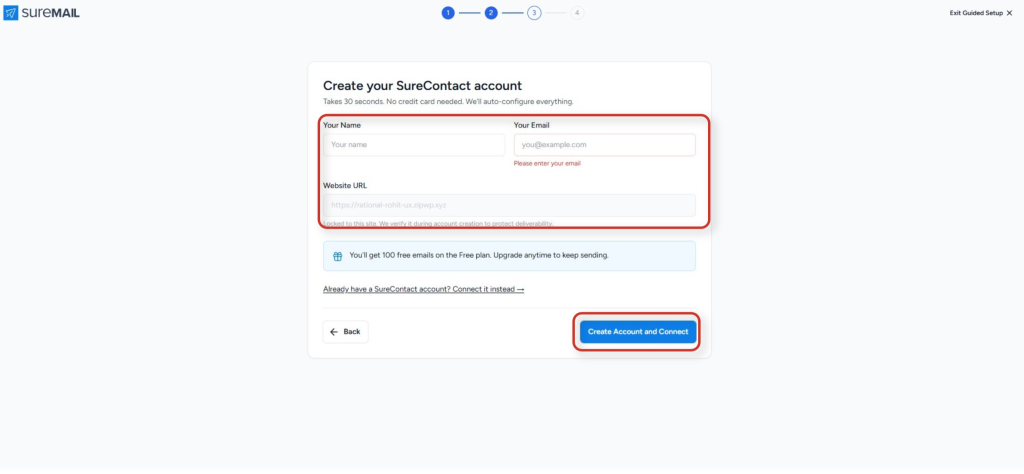
5. Add your Name, Email, WebSite URL and click on Create Account and Connect
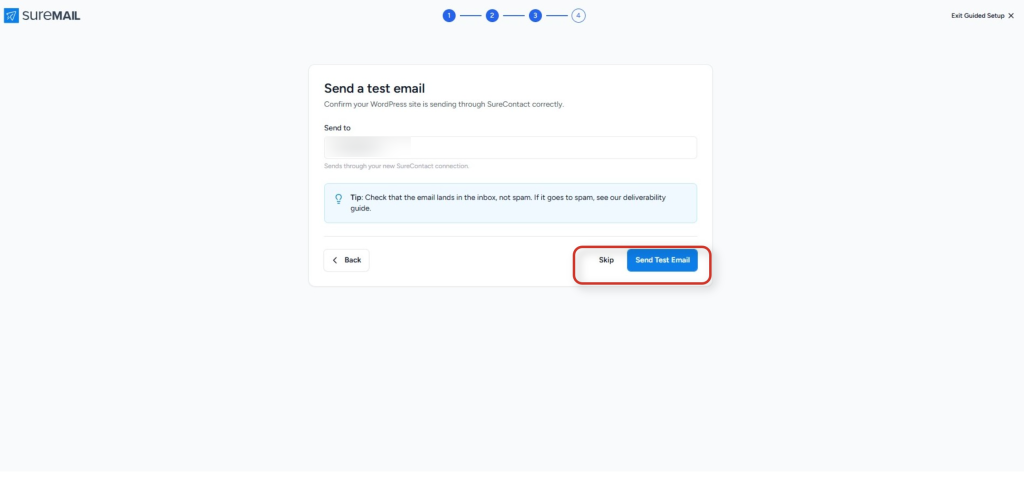
6. You can now send a test email from the SureContact domain to yourself or to any email for testing or you can skip it
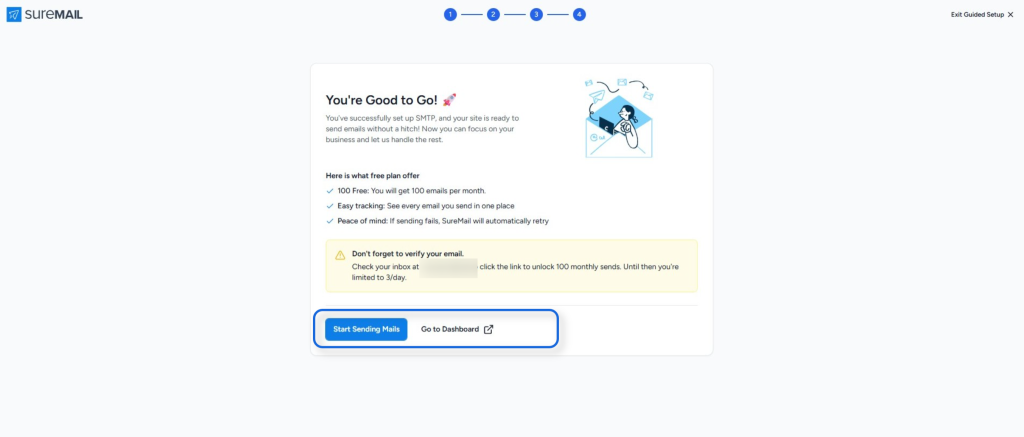
7. You can now see Successfull message and now start sending Mails or go to the dashboard of SureMails
Existing SureContact User – Connect an Existing SureContact Account to SureMails
Follow these steps if you already have a SureContact account and want to link it to SureMails. This flow uses OAuth – no manual API key copying is required.
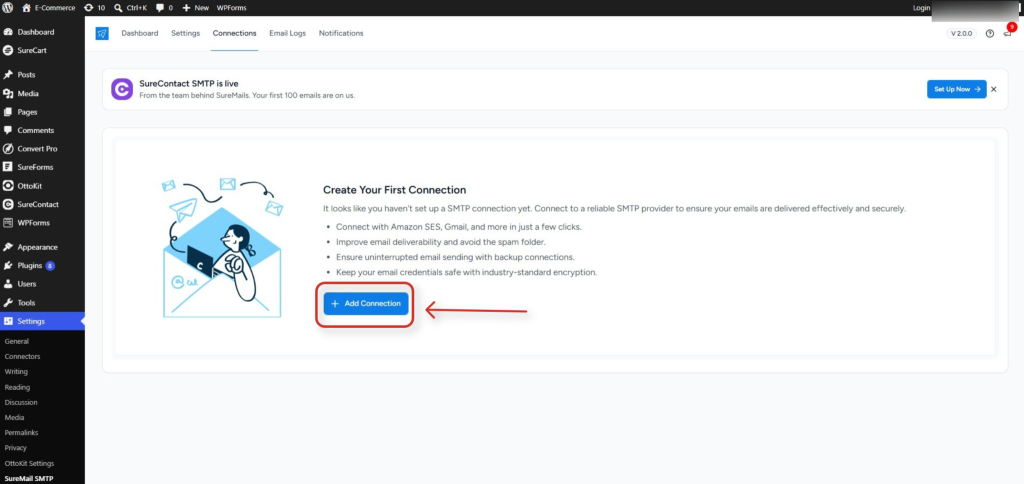
1. Open SureMails
- In your WordPress dashboard, navigate to WP Admin → SureMail → Connections → Add New Connection.
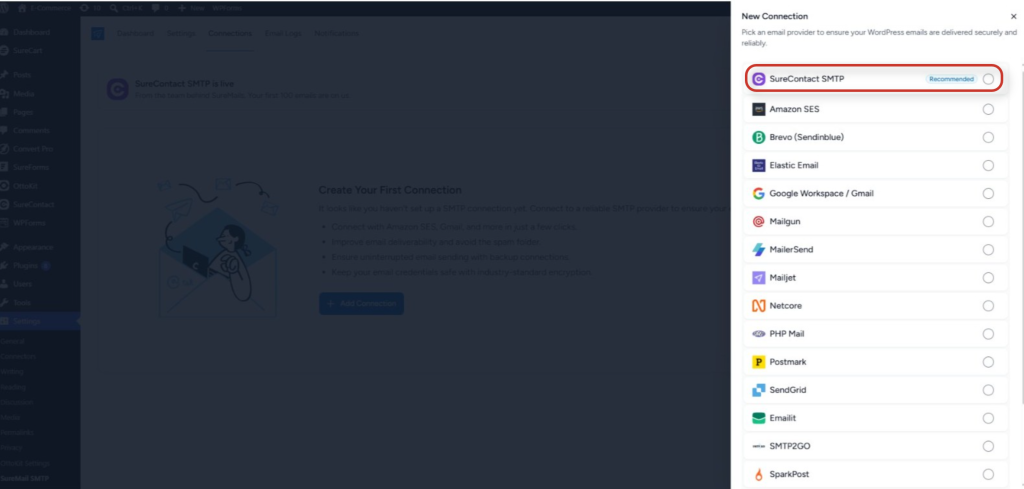
2. Select SureContact as the Provider
- Choose SureContact from the provider list.
3. Click “Already have a SureContact account?”
- This link appears below the new account form.
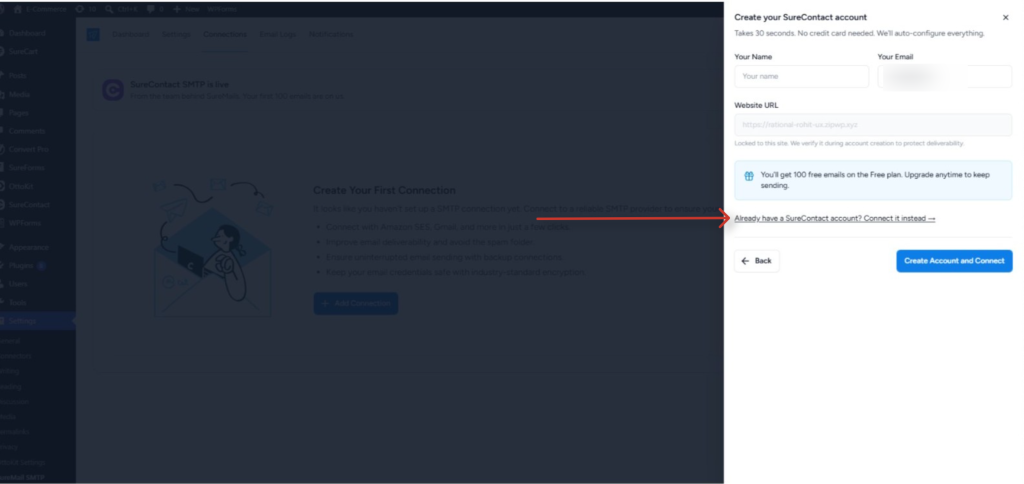
- Click it to switch to the existing account connection flow.
4. Authorize on SureContact
- You are redirected to app.surecontact.com/connect.
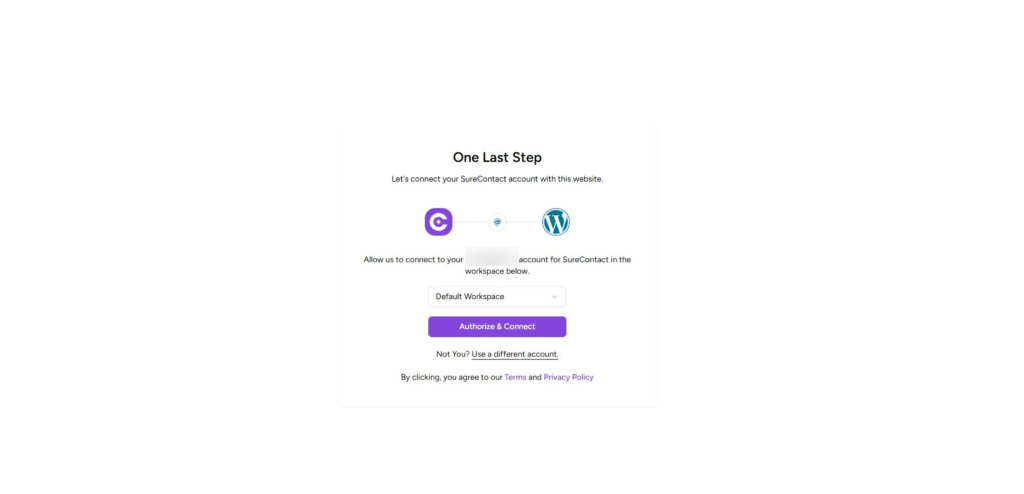
- Log in to your SureContact account if prompted, then approve the connection request.
5. Redirected Back to WordPress
- SureMails automatically exchanges the authorization token for an API key and saves the connection.
- No manual copying of credentials is required.
6. Connection Is Active
- Your existing SureContact workspace is now linked to SureMails.
- The connection automatically uses the plan, verified domains, and email quota from your existing account.
Paid SureContact Users – Adding a Sender from a Verified Domain
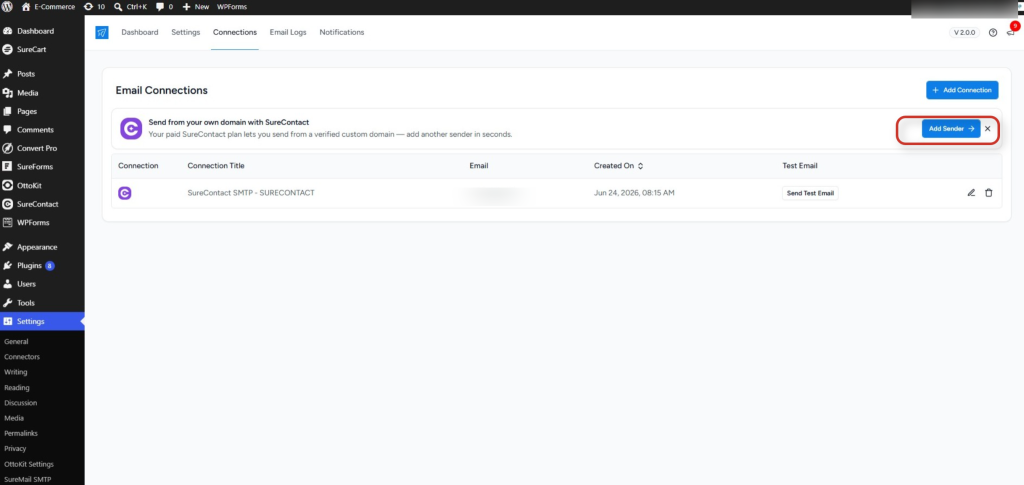
Once on a paid SureContact plan, an Add Sender button appears on your SureContact connection in SureMails. This allows you to add additional from-email addresses using domains already verified in your SureContact account.
1. Click Add Sender
- On the existing SureContact connection in SureMails → Connections, click the Add Sender button.
2. Select a Verified Domain
- A dropdown displays your verified sending domains from SureContact.
- Select the desired domain (for example: mail.yourcompany.com).
3. Enter the Local Part of the Email Address
- Enter the portion of the email address before the @ symbol.
- Examples: support, hello, noreply.
4. Click Save
- A new connection entry is created in SureMails using that from-email address.
- This new sender shares the same SureContact workspace API key as the original connection.
Things to Know
100 Free Emails Are Lifetime Credits, Not Monthly
- Once the 100 free emails are exhausted, sending stops with a SEND_CAP_EXCEEDED error until you upgrade your plan or purchase a top-up in SureContact.
Email Verification Is Mandatory
- Verification links are valid for a limited time. Use the Resend Verification Email option in SureMails → Connections if the original link expires.
One API Key for One website per SureContact Workspace
- While you can connect multiple websites to the same SureContact Workspace
- All connections created from the same SureContact workspace share a single API key.
- If the workspace is disconnected on the SureContact side (for example, due to plan cancellation), all SureMails connections associated with that workspace are revoked.
Recipient Suppressed Error*
- If sending fails with RECIPIENT_SUPPRESSED, the recipient address exists on SureContact’s suppression list due to a previous bounce or unsubscribe.
- This cannot be overridden from SureMails.
Troubleshooting
Q: Why do I see the error “No verified sending domains were found for your SureContact account” when clicking the New Sender option in SureMails? How can I fix it?
Error Screenshot:
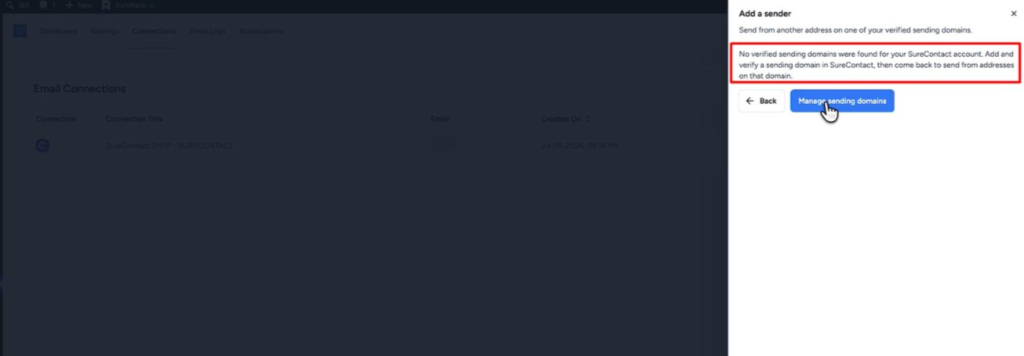
Ans: This error appears when your SureContact SMTP has not been assigned to the workspace you’re trying to use with SureMails.
To resolve the issue:
- Log in to your SureContact account.
- Navigate to your SMTP settings and assign the SMTP to the appropriate workspace.
- Refer to this screenshot for guidance:
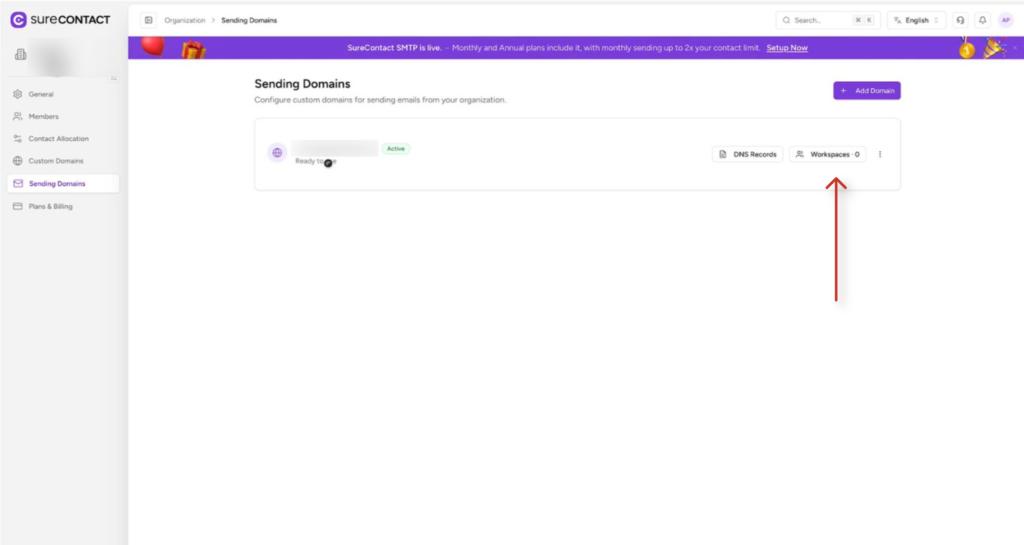
- Click on Workspaces, and then tick the workspace that you want it to be assigned to and click on Done
- Once the SMTP has been assigned, refresh the SureMails plugin (or reload the page).
After refreshing, the error “No verified sending domains were found for your SureContact account” should no longer appear, and you’ll be able to add your sender successfully.
Need Help?
If you need any assistance, please email [email protected] & [email protected], and our support team will be happy to help you.
We don't respond to the article feedback, we use it to improve our support content.